They say the most dangerous tool in the kitchen is a dull knife.
I watch a ton of cooking shows: Netflix, TV & YouTube. And every time I watch an episode I hate the fact these cooks can slice and chop vegetables so easy and effortlessly.
Why?
Because they (most?) all have professionally sharpened knives to cut with.
Look, I can’t afford to send my knives out once a month or whenever to have them sharpened. I do with what I can.

For a while, I used only a sharpening steel. Then I learned a sharpening steel doesn’t “sharpen” blades, per say, only hones them – that is, to correct any bending or micro dents along the blade back to an upright point. So because it doesn’t sharpen, over time it’ll get duller and duller with each use no matter how much you use the steel. And knives purchased from anywhere are not that sharp to begin with out of the box.

Then I got one of those all in one sharpeners. One side is rough for grinding any burrs along the blade and one with a finer grit to sharpen & polish. And it was okay, but I still didn’t get that super-sharp edge I kept seeing. But it was enough for me to limp along until maybe I can afford to send my blades off to be professionally sharpened.
Then I came across this: Work Sharp Precision Adjust Knife Sharpener It had good reviews, inexpensive (relatively) so I bought it.

Setup was a breeze and the learning curve was minor. Assemble, attach knife, adjust what degree an edge you want (Kitchen knives they recommend 20 degrees) Grind with the 320 grit, sharpen with the 800 grit and hone with the porcelain.
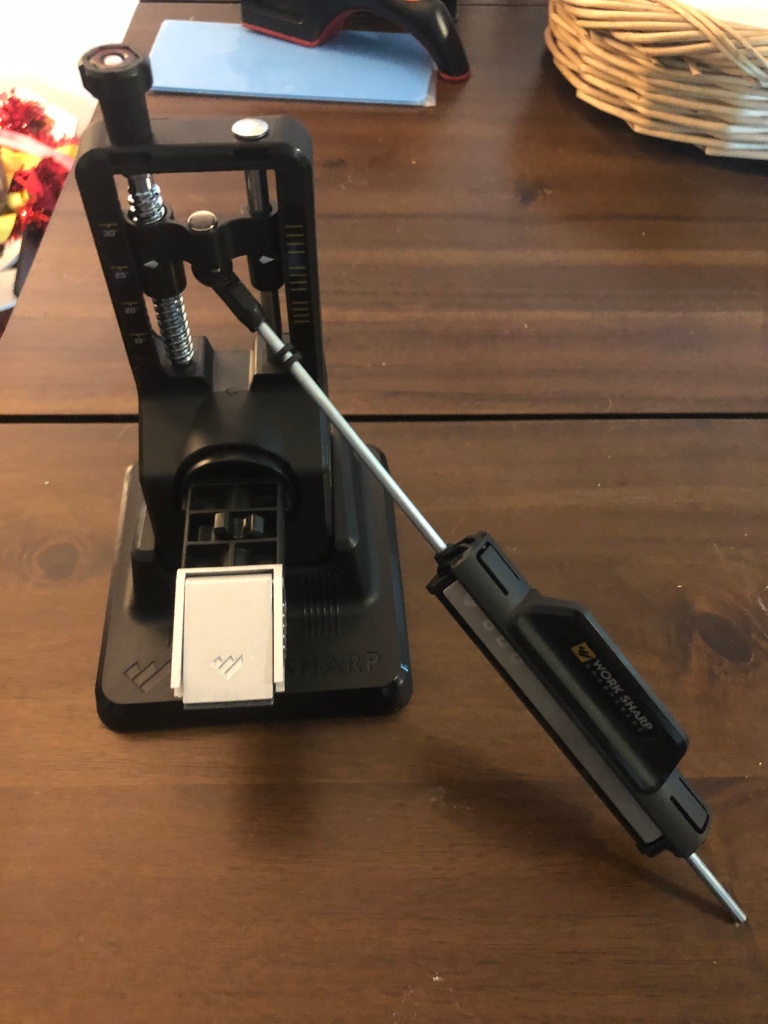
So, I’ve done a few knives and really impressed, and thought I’d show you how easy it is.
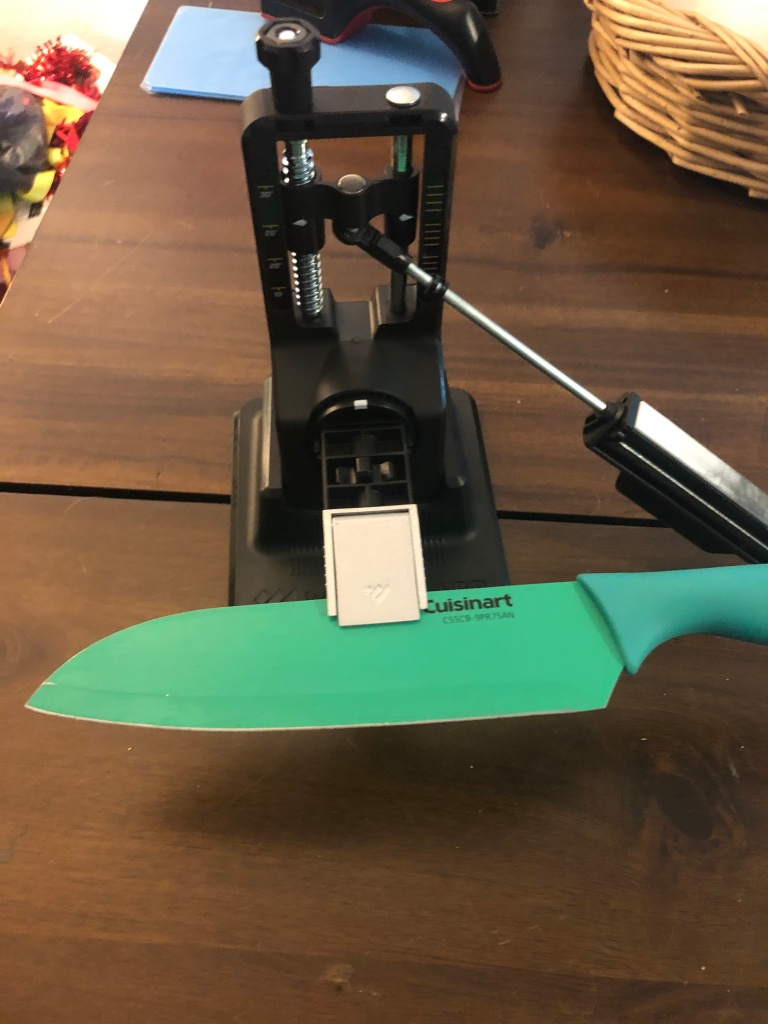
The thing to remember is for each step (grind, sharpen, hone) do it for both sides before you move to the next step.

The nice thing is, the knife clamp is on a gimble so you can twist it 108 degrees and the other side of the knife is ready without having to remove & reattach each time.

After sharpening, I really didn’t know how to illustrate how well this works. Then I remembered I have tomatoes.
For me, I almost always have to use a serrated blade to cut these. And even then I can’t get it super thin like I’d want. These traditional knives I’d have to move back and forth a few times to finally break the skin and cut. Not the best thing.
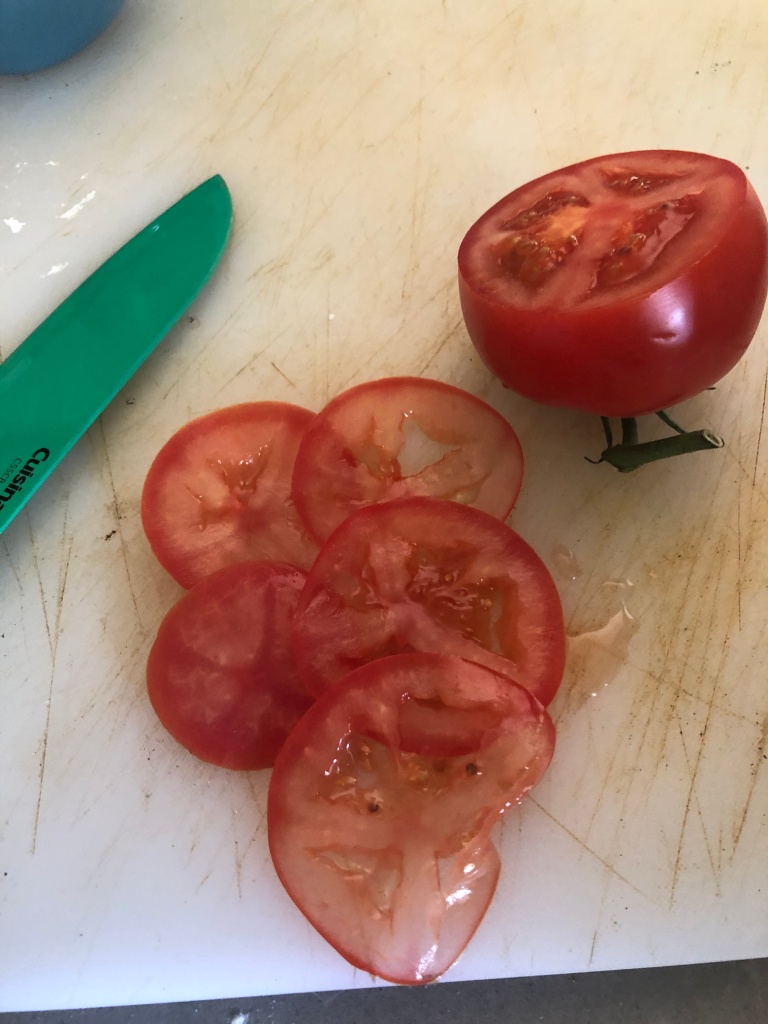
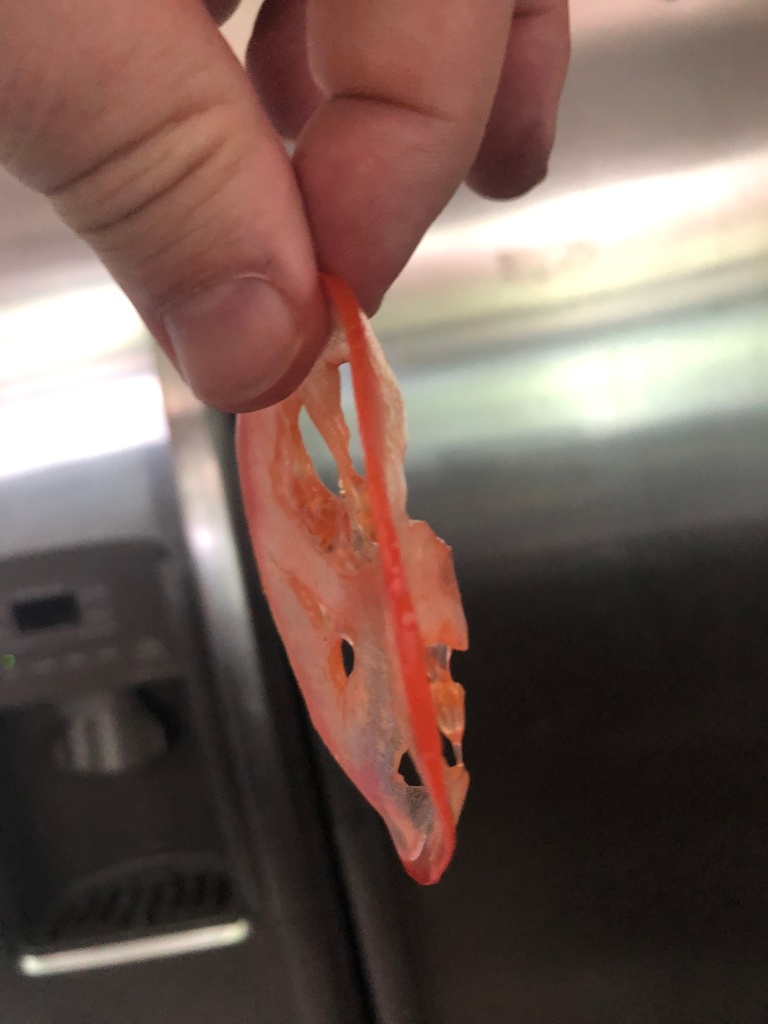
With this newly sharpened knife, it cuts through but-tah! And super thin. The slices are translucent they were so thin. I am definitely pleased.
So, overall verdict: Love it. My only complaint is there’s not a way to clamp it to a table surface to make it steady, but after 4 sharpenings, I haven’t had that much of a problem with it tipping. Now, it won’t do that cut a piece of paper trick you see people often demonstrate, but using it on onions, tomatoes, carrots and a cooked steak I can definitely tell a difference and I can officially say my knives are indeed sharp.

Those slices!!!
LikeLike